
The #1 question screen printers and print shops have is “How do I set my prices?” This is a topic as controversial as it is difficult – every shop we talk to at Printavo has a different strategy for their screen printing pricing. That’s why we built the screen printing pricing matrix.
We’ve spent several months developing a way to encourage responsible pricing. We are not accounting or pricing experts, but we knew that we could add something valuable: what if we could help print shops generate a price matrix for every job they print?
There are lots of tools, softwares, and methods for developing a pricing model for screen printing shops.
We wanted to arm you with something simple that you can use to generate a screen printing pricing matrix.
From there, you can take the wheel and make your own adjustments for your own unique financial situation. Here’s what we came up with: 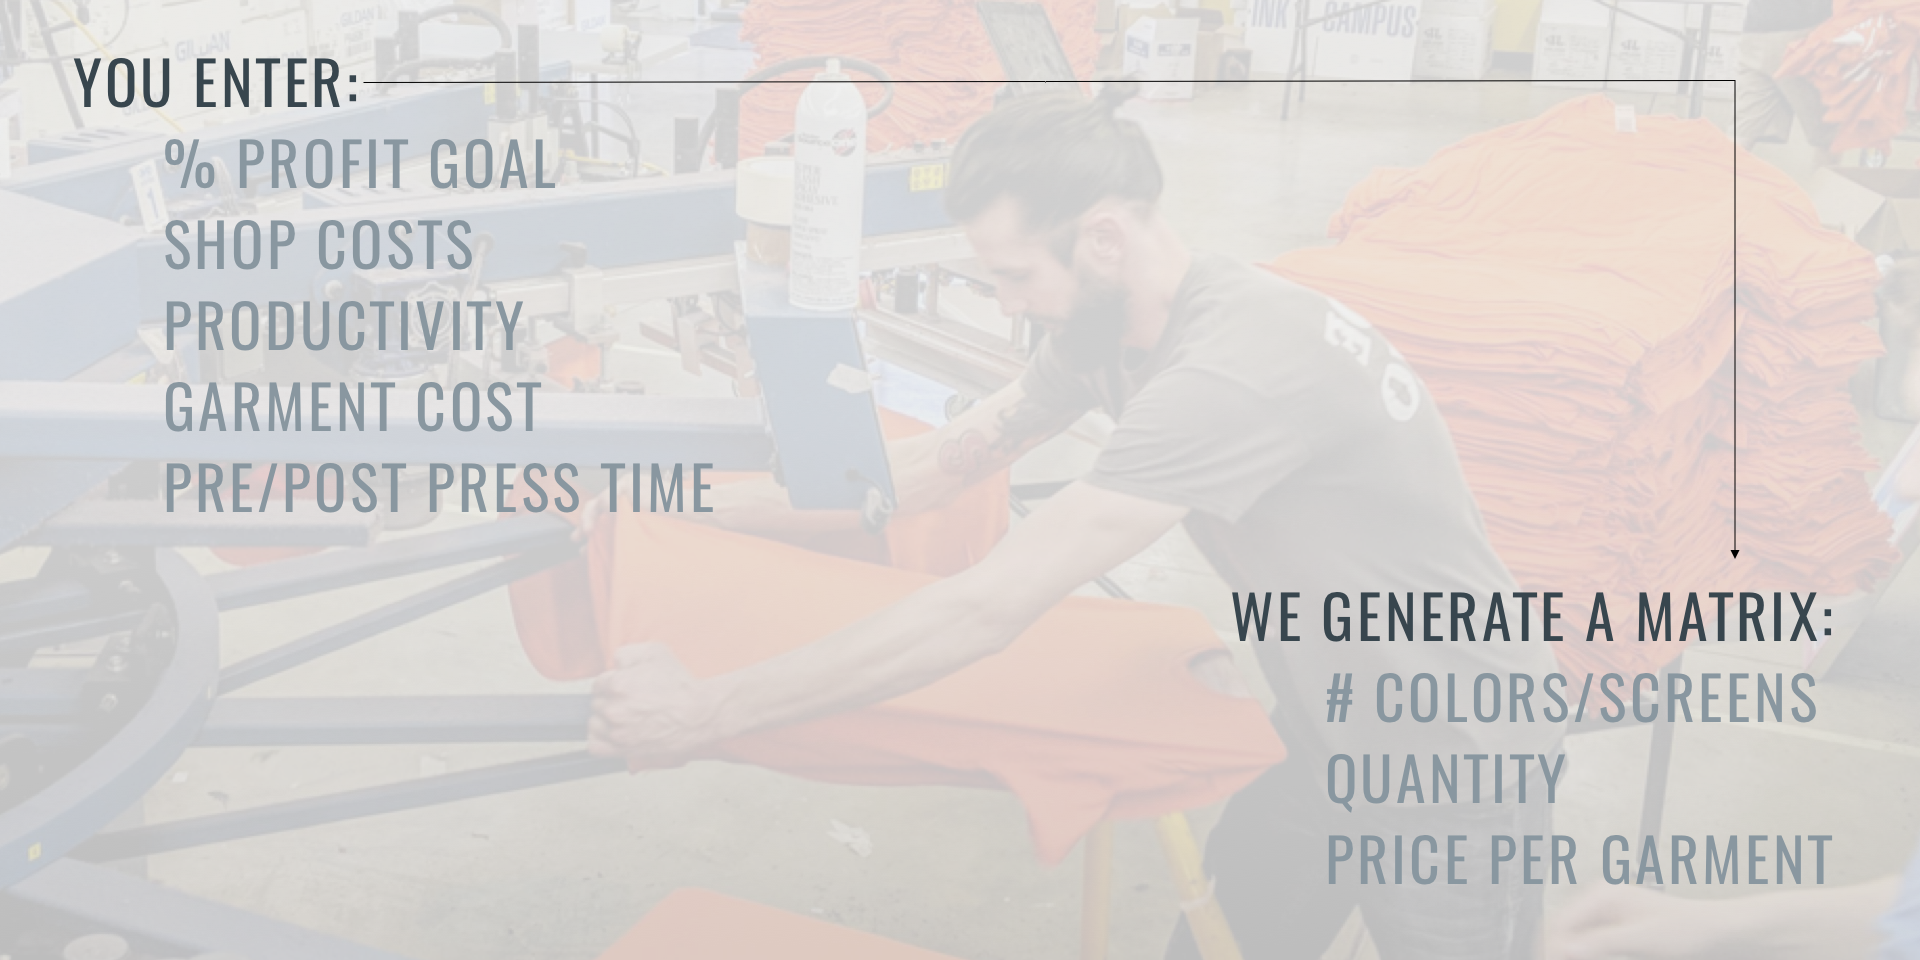
To use our screen printing pricing matrix generator, there are 7 essential steps. It’s important to understand them all so you can get the most out of the spreadsheet (and modify it for your own purposes). The 7 basic steps are:
- Set a goal profit percentage. This helps you base your prices on your goals instead of merely covering your costs.
- Define your shop’s monthly costs. While your costs may change, we suggest using a “slightly higher than average” number for your monthly costs. We’ll use these values to help calculate a “cost per impression.”
- Tell us about your shop’s production capacity. You’ll define some metrics (which you may or may not know, but can generally estimate).
- Impressions per hour. How many times can you print in an hour? Here, we mean the number of times you pull the squeegee across the screen.
- Your utilization rate. How much of a working day is spent actually printing? We give you a range of values (from 5% to 50%). Be aware that the typical shop operates at less than 30% utilization!
- Number of presses on this specific job. How many presses are going to be operating at the same time on this job?
- Set your garment price and markup. How much does each garment cost, and how much do you want to mark it up by?
- Tell us your hourly labor rate for setup and break-down. How much does administration, art, and your screen room employees cost per hour?
- Tell us how long setup and break-down will likely take. How long do you estimate spending on administration (sales, communication, data entry, etc.), artwork, and pre/post press activities (screen burning and reclaim, setup, etc.)?
- Modify the price matrix as needed. You can alter quantity, the number of screens/colors, and more.
You can invest as much or as little time in calculating accurate values each step as you choose.
Initially, you may need to estimate certain values (or develop a plan to collect more data) to get an accurate value. As the saying goes, good stuff in, good stuff out.
The more accurate your inputs, the more accurate your price matrix eventually is. Once you’re finished, you can add your prices to your screen printing management software.
You can also calculate pricing for signage with our matrix. Here’s how:
Step 1: Select your profitability goal

You select a percentage from the drop-down menu. The higher the percentage, the more the tool will charge per screen printed impression (and the higher your shop’s suggested hourly rates and daily revenue targets will be). How this number is used: this value is used to calculate an idealized cost per impression.
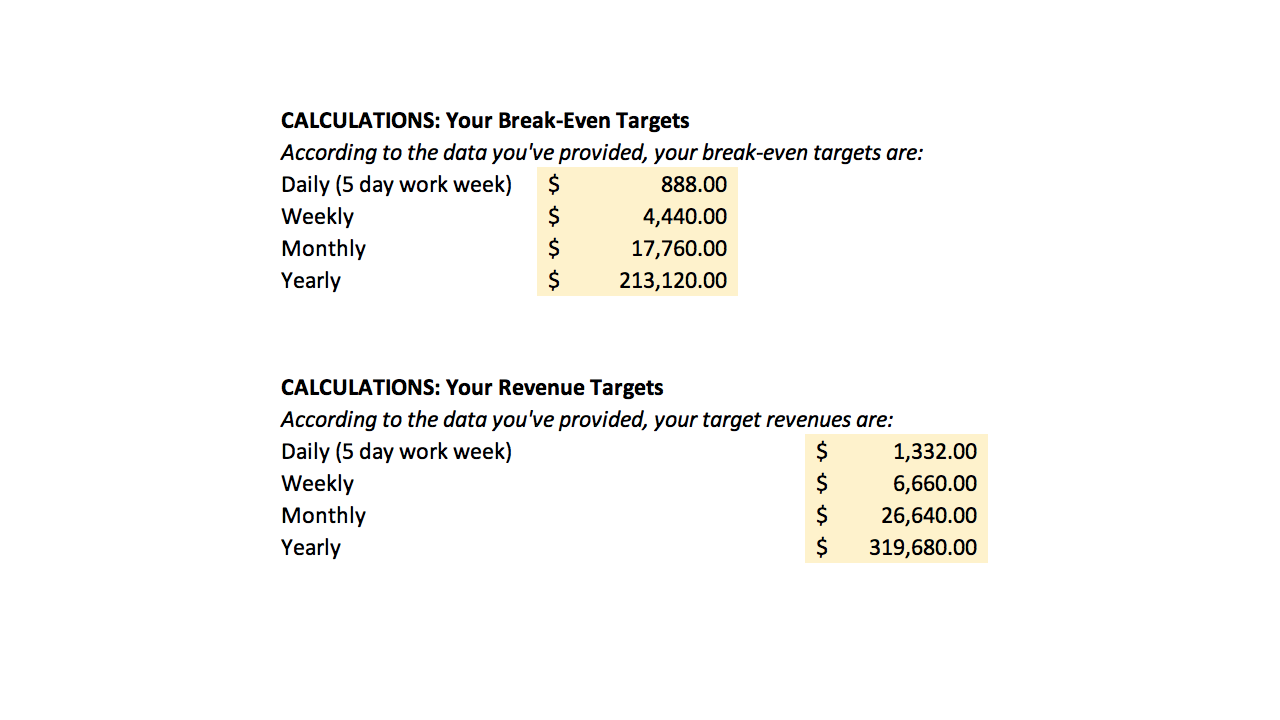
Since you are not inputting your revenue – and this is a forward-looking calculation – we provide you a “target revenue” based on your costs plus the desired percentage of revenue above those costs. To clarify: if your shop has $1,000 in costs per month, your target revenue (at 50% profit) would be $1,500.
Step 2: Input your monthly costs
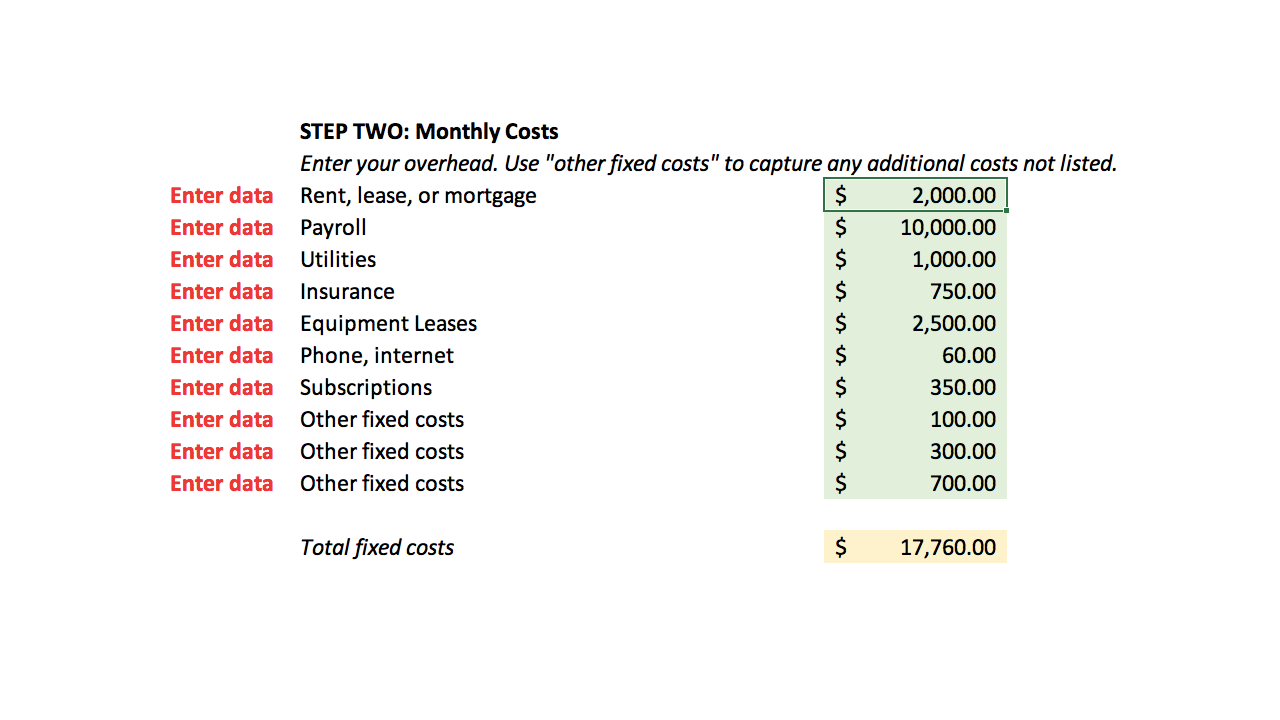
- Rent, lease, mortgage
- Labor expenses
- Utilities
- Insurance
- Equipment leases
- Phone, internet
- Subscriptions
- Other fixed costs
We’ve provided three extra cells for additional costs. This is where you may want to play your variable costs: office supplies, inks, tape, and other consumables.
We can’t anticipate every shop’s different costs, but these cover most of the bases. We’ve found that labor expenses, rent, and equipment leases are typically the lion’s share of a small-to-medium print shop’s monthly expenses.
How these numbers are used: these numbers are used to calculate your estimated total monthly operating costs. You will be provided with:
- Break-even targets. These are how much you have to make daily, weekly, monthly, and yearly to cover your shop’s costs. If you’re trending below these numbers, you are off track.
- Profit targets. These are how much you have to make daily, weekly, monthly, and yearly to cover your shop’s costs and meet your defined profit percentage. If you’re trending at or above these numbers, you are on track.
From there, these break-even and target numbers are used to calculate several values which factor into your screen printing pricing matrix.
Step 3: Input your shop’s estimated production capacity
Let’s be transparent: this is where things get a little bit more challenging. Let’s dive in to each area separately and help you understand what values to input. 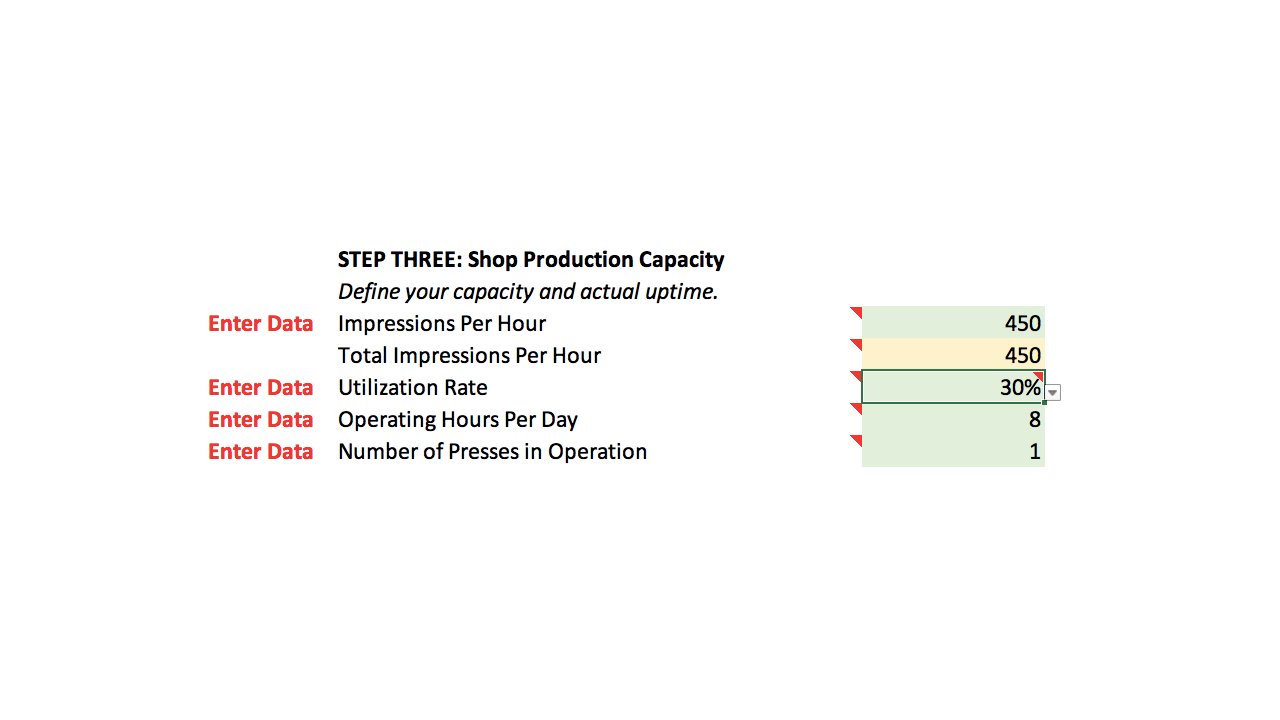
- Impressions per hour. This is an estimate of your production capacity. Don’t think of this as how many shirts you can print in an hour, think of this as how many times you do an impression (in other words: dragging the squeegee across the screen).
- Automatic presses are capable of 1080 pieces an hour, but it’s far more likely that your shop operates between 300 and 600 impressions per hour.
- Manual press operators often operate between 80 to 150 impressions per hour.
- Tip: calculate the number of impressions for a job, and then time how long printing takes. Do this repeatedly to get an estimate for how many impressions per hour are likely in your shop.
- Tip: use a lower value than you may actually be capable of to ensure you are compensated fairly.
- Total impressions per hour. Unless you are planning on operating more than one press for this job, you don’t need to alter this field. If you are using one press for the job, this value should be the same as your impressions per hour.
- Tip: to change this value, alter the Number of Presses in Operation cell. It will simply multiply the number of impressions per hour by the number of presses.
- Utilization rate. This is the most important metric in the spreadsheet. Your shop’s utilization rate is the percentage of time your presses are actually printing. We have discussed shop utilization with dozens of shop owners and industry consultants and found that shop utilization tends to be no greater than 40% (and, typically, is much closer to 20-30%).
- Tip: if you’re unsure of your utilization rate, we suggest a default rate of 30%.
- Tip: estimate your utilization by measuring how much of each day at your shop is actually spent printing.
- Tip: utilization will almost never be higher than 50%. We have given you more options but we strongly suggest keeping your utilization around 10% lower than you believe it actually is.
- Operating hours per day. This is how many hours your shop is in operation per day.
- Number of presses in operation. This is NOT how many presses are in your shop. This is how many presses will be in use for this particular job. Typically, this should just be left as “1.” Changing this value will alter the “Total impressions per hour” cell and affect your pricing.
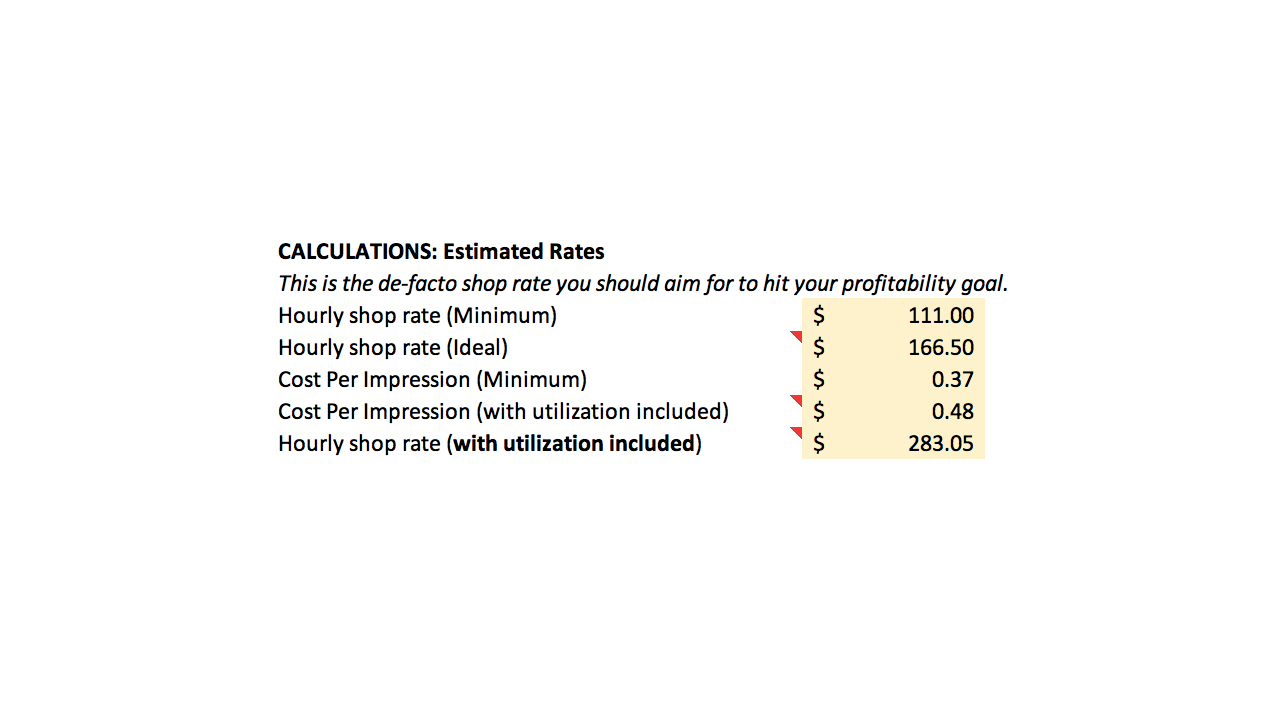
Gaining insights: cost per impression, hourly shop rates, target revenues
-
- Hourly shop rates. You are shown a minimum hourly shop rate, an ideal hourly shop rate and (most importantly) hourly shop rate with utilization included.
- Minimum hourly shop rate is the amount, per operating hour, that you need to hit to pay your bills.
- Ideal hourly shop rate is the amount, per operating hour, that you need to hit to pay your bills and achieve your profitability goals.
- Hourly shop rate (with utilization included) is the amount, per operating hour, that you need to hit to get to your profitability goals when your actual shop utilization is factored in.
- Hourly shop rates. You are shown a minimum hourly shop rate, an ideal hourly shop rate and (most importantly) hourly shop rate with utilization included.
Tip: these values may seem higher than you anticipate. It is worth examining how utilization plays into your shop’s hourly rate: as utilization goes up, your hourly rate goes down (you’re more efficient per hour).
-
- Cost per impression. This is an estimated cost per impression. You’re provided with two different numbers, but only one is used in the pricing matrix calculation.
- Cost per impression (minimum) is simply the Hourly shop rate (Ideal) amount divided by your Impressions per hour. This is not used for calculations.
- Cost per impression (with utilization included) is calculated the same way but includes a markup equal to your utilization rate. For example, if your utilization is 30% and your cost per impression is $0.50, this cell will populate as 30% of $0.50 ($0.15) plus $0.50 for a total of $0.65. This cell is used for calculating the price matrix.
- Cost per impression. This is an estimated cost per impression. You’re provided with two different numbers, but only one is used in the pricing matrix calculation.
These numbers capture what you need to take in to cover your costs (break-even targets) and also provide a high-level target revenue to match your desired profitability. These are highly idealized values, but they can still be useful as a benchmark to check against.
You can do basic back-of-the-envelope calculations about how long a job will take and compare the price to your revenue targets. This could help you know whether to take a job, raise or lower the price of a quote, or subcontract a money-losing job.
Step 4: Garment Pricing
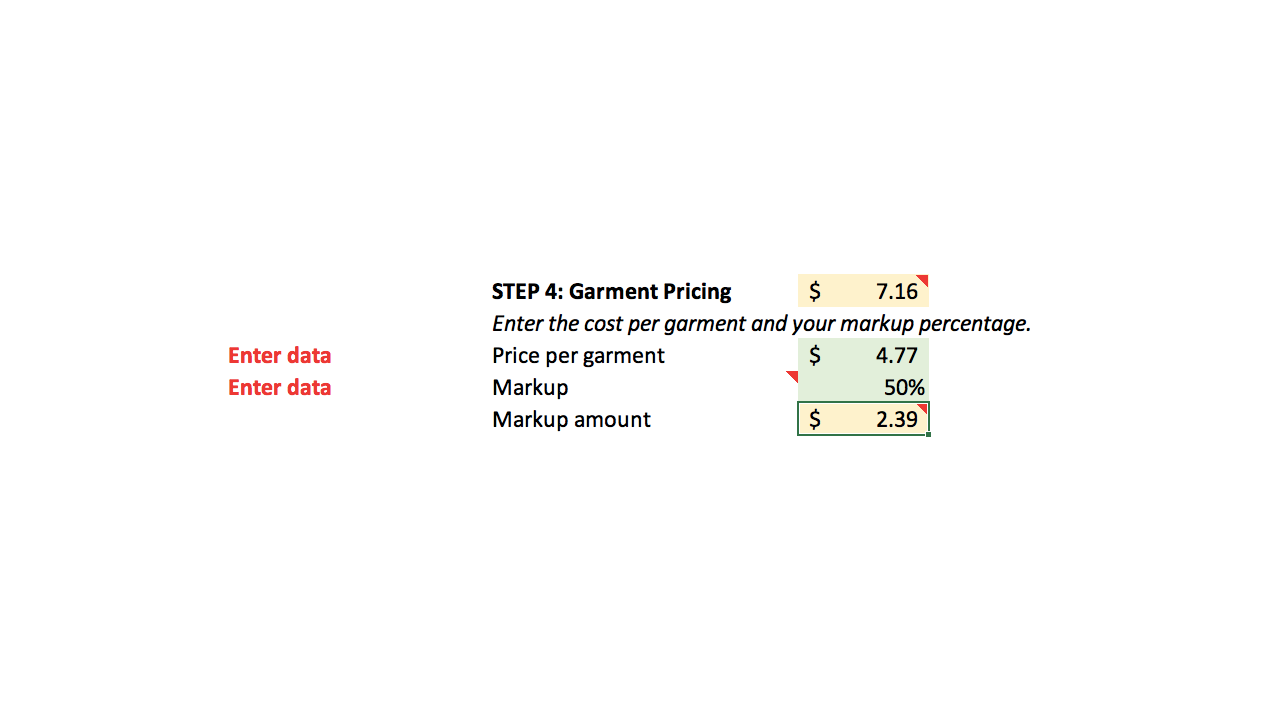
“How do I know what to charge as a markup?” You can choose a percentage markup from the drop-down menu. It will calculate the specific dollar amount and display it beneath the drop-down menu.
Ultimately, the markup you charge is based on your judgment. Note: the price per garment that’s displayed in your pricing matrix will never fall below the yellow “Garment Pricing” amount (here, $7.16).
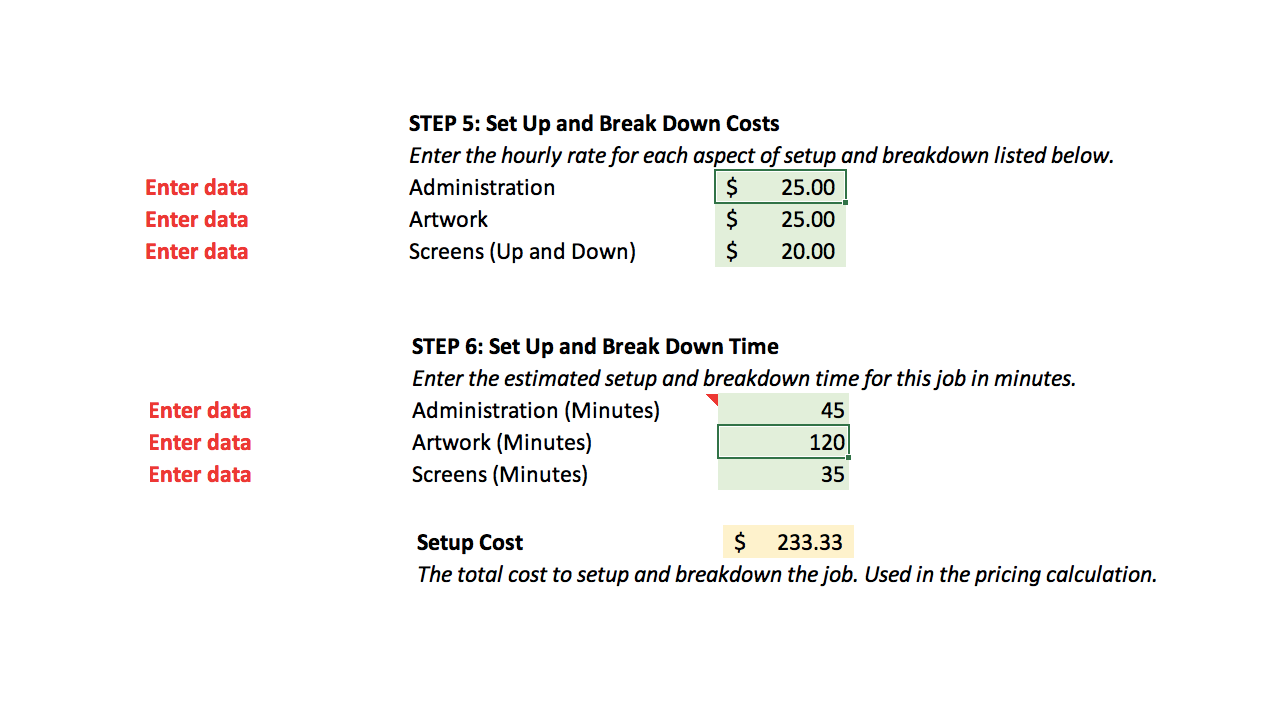
Steps 5 and 6: Set up and break down (pre and post-press costs)
- Administration. This is the time and effort expended to get the job into the shop. It could include sales, gathering information, getting approvals, ordering garments, etc. – anything that is required to administer the job and get it on press.
- Artwork. This is the time and effort spent on crafting custom artwork.
- Screen time. This is the time and effort spent on:
- Burning screens
- Reclaiming screens
- Setting up screens on press
- Any other printing-related non-printing labor
Determining your set-up and break-down cost is simple:
- Enter the hourly rate for each department. Sum the cost of labor for that department on a given hour of work (i.e. two people at $15 an hour = $30)
- Enter an estimated amount of time (in minutes) to be spent on the job. While you may not have a clear picture of exactly how long it will take to set-up and break-down a job, this is a great way to estimate the the cost of pre-and-post press activity.
Tip: If we haven’t accounted for some element of your set-up and break-down process, we suggest adding additional time under the Administration section.
Step 7: Generating and modifying pricing matrices
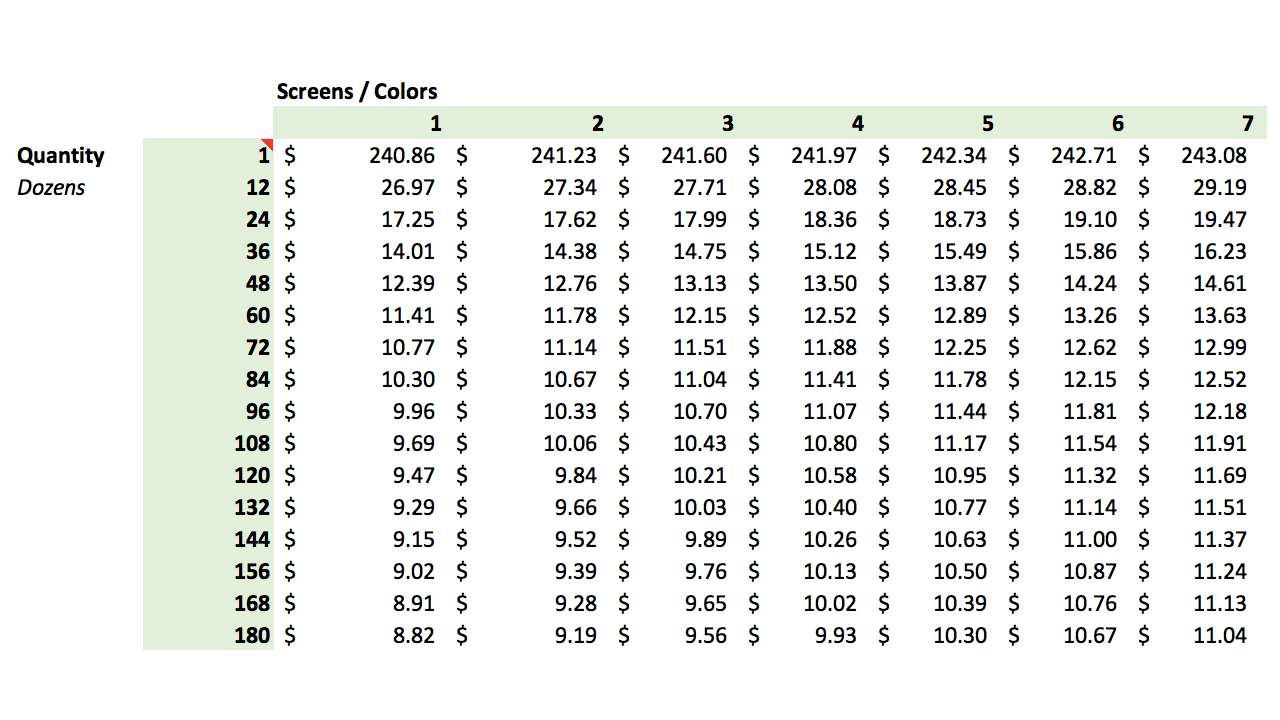
- It should be obvious why screen printing shops have minimum order sizes. It’s simply not reasonable to do small orders given the costs involved.
- You can modify the quantity that the matrix displays to your liking. Feel free to change the green quantity values to anything you like. It may be helpful to use dozens, but for a very accurate picture you can replace dozens with single garments.
- You can modify the number of screens to your liking. Each “screen” is simply an impression. If you need to add more colors, go for it!
Tip: since this is a simplified pricing model, you can add ~1-5 “colors” as an additional print location, or add 1-2 colors to represent flashing.

A spreadsheet never replaces your good judgment and hands-on knowledge of your shop.
We hope this helps your screen printing quotes become more accurate and profitable. But we think this can give you a boost. With this tool, you can start to examine the relationship that pricing has in relation to your shop’s productivity, your shop’s costs, and your revenue goals. We will continue to update and improve this tool as time goes on.
Special thanks to Andrea Harmon from Idaho Shirt Stack for her corrections and feedback!

0 Comments