
If you run online stores, you must ship every single product correctly. Every single time.
With the growth of fundraisers run by print shops (and dozens of other online store success stories), it’s obvious that screen print shops have a huge opportunity thanks to online stores.
But there’s a catch!
You can sell thousands of products online – but you have to pack, bag and tag, and ship your products perfectly. Otherwise, you’ll lose money and time as you struggle to keep up with refunds, exchanges, and angry customers who leave bad reviews.
There’s good news, though. It’s easy to sell and ship T-shirts and other screen-printed apparel (they’re the “perfect e-commerce product,” after all). You just have to follow 9 simple steps to make it easier.
Why you’d want to buy from Campus Ink:
An early adopter of Printavo Merch, Steven has built a business around online stores. His network of university-based students utilizes online stores to collect orders – while his shop prints and ships the orders. After more than $1M in sales purely through Printavo Merch, Steven has perfected a system for delivering perfect custom T-shirts and merchandise directly to customers.
Campus Ink is an industry leader in NIL licensing for collegiate athletics across the U.S. and is backed by a sizable investment from Marc Cuban.
Simple principles: set yourself up for success with online stores
A tailored experience
You’re under a magnifying glass with online stores! You don’t know which business your customer owns, what they do, or who they’re connected to within your community – so get it right.
Spoilage is not an option
Fifty shirts were ordered? You’re going to print 50 shirts. Don’t overprint (that can blow your profit margin). Ship everything on time and send everyone exactly what they ordered. Remember: one bad order can ruin everything. Spoilage is not an option.
Use a master list to check every order against
You must use some kind of master list once an online store closes. This is the key that you check all the work against. Print off several copies and agree on a single, simple way to use them.
Steven and the Campus Ink team use Printavo Merch’s CSV export once their stores close.
Step 1: Count in products when they arrive
The goal: nothing is missing.
How to do it: as items arrive, count them in and cross them off of your master list.
This is the first layer of insurance.
You are simply making sure that each and every T-shirt, hoodie, or different piece of merchandise comes to your shop and is ready to print.
This is probably a part of your production process already. But it’s even more crucial for online store orders.
Step 2: Sort printed products by size, style, and design
The goal: you print exactly what was ordered – nothing more or less.
How to do it: sort your printed products on tables. Small, medium, large (and so on) – for each style and design.
Once you’ve printed everything for your orders, you’re going to fold, sort, and lay it all out.
You’re setting yourself up to take a big-picture overview of what you printed during this step. Everything should exactly correspond to what was ordered.
Step 3: Check what was printed against the actual orders
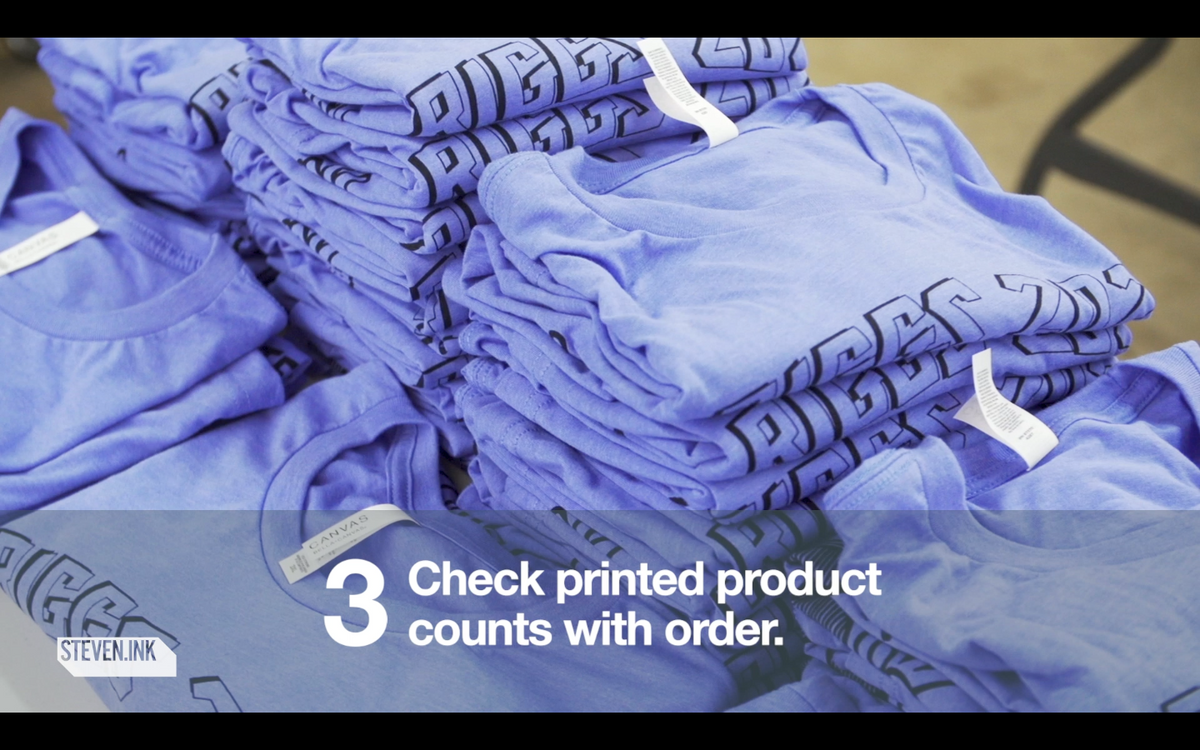
The goal: ensure printed exactly what each customer ordered.
How to do it: carefully check the total expected number of each style, design, and size for all orders.
This overall survey ensures that you don’t need to re-burn screens, re-print shirts, or scramble to find missing items.
Take the big-picture approach and make sure you have every small, medium, large (and more) size accounted for.
You total the number of each size – and ensure you have that many printed.
There should be no extras or missing pieces – but now is the time to correct that if it happens. Not later!
Step 4: Check that every single packing slip is accounted for
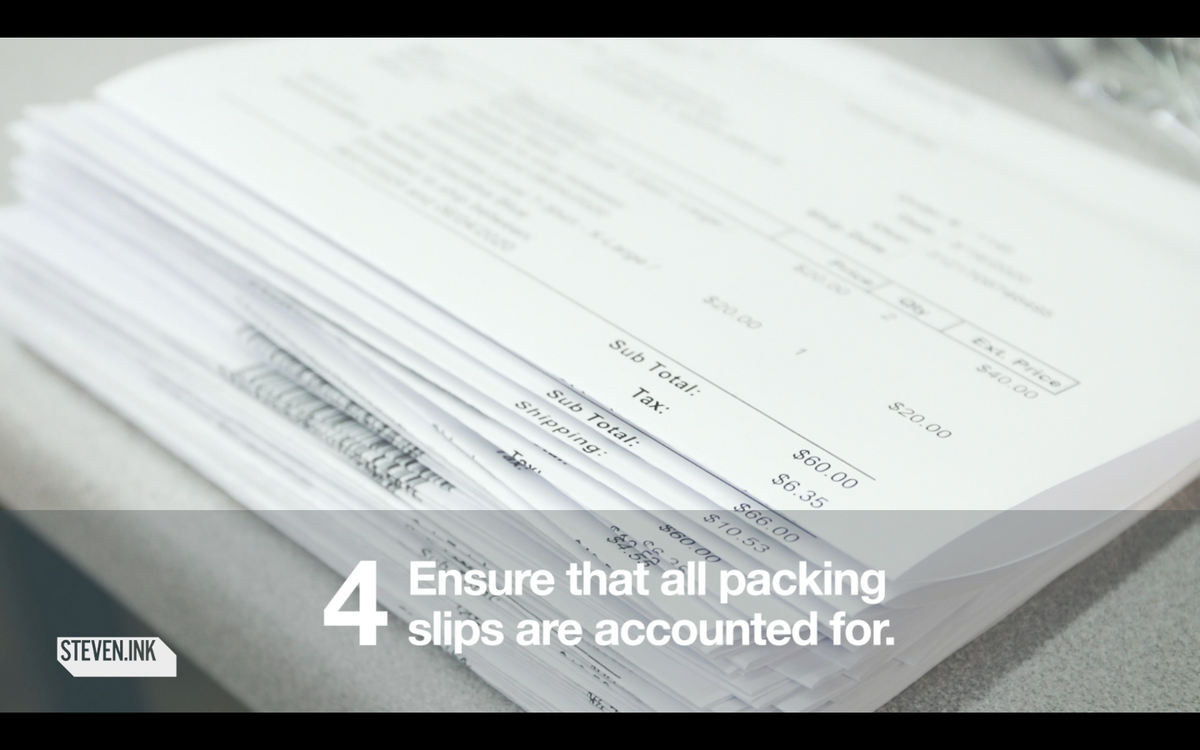
The goal: ensure no physical errors with packing slips
How to do it: after you print your packing slips, compare them to your master list of orders.
This may seem frivolous, but it’s not.
What if your printer breaks? What if you misplace a packing slip?
Surprisingly, this is a common spot for errors.
Always double-check that every single packing slip for every order has been printed and is correct.
You can also improve your packing strategy with automation and equipment that helps you speed up the process.
Enter the ROQ Automatic Fulfillment System, which connects with your ERP System. This system also enables UPC codes or UPS labeling info to travel through the machine’s entire process– from folding to stacking, packing, and labeling. Check out how it works in the video below.
ROQ estimates this system can automatically crank out more than 450 garments efficiently folded, stacked, and packed “every hour, on demand,” with 80% less labor costs! If your shop’s looking to scale up to meet heavier order volume, this is a great way to equip your team with the tools they need.
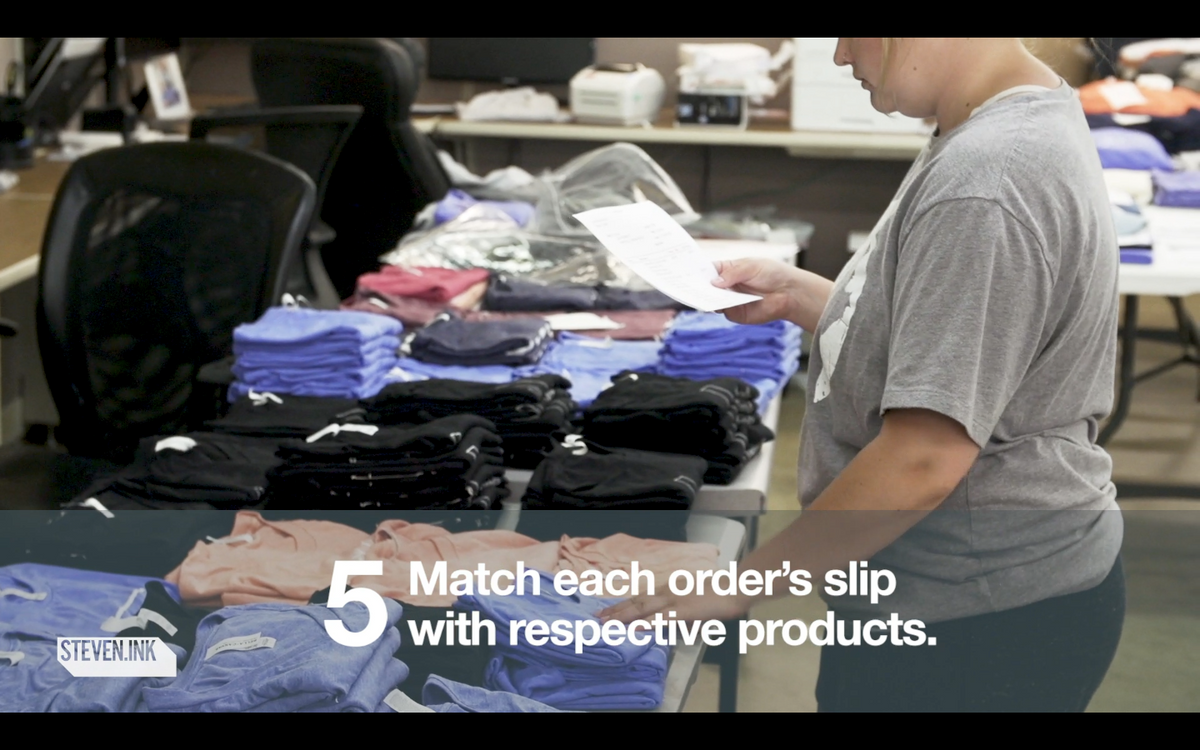
Step 5: “Pre-bag” every product by matching packing slips to orders
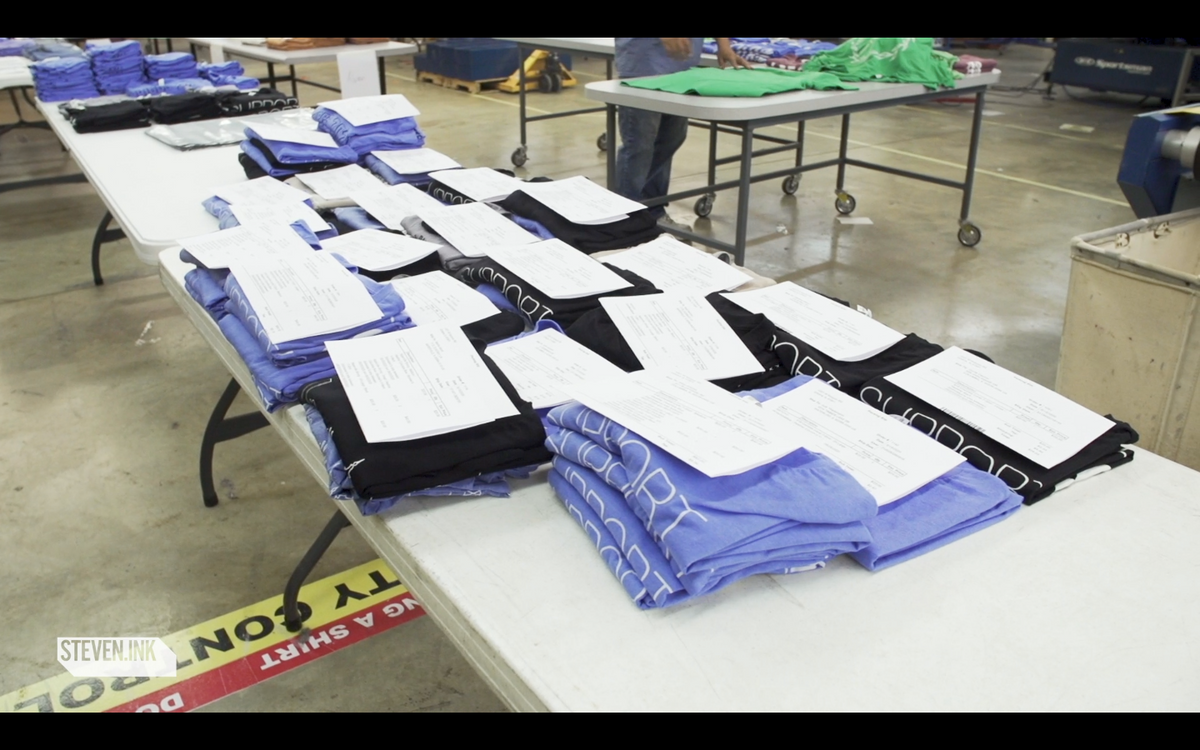
The goal: add another layer of accuracy to your shipping process.
How it works: each filter you’ve added – checking in, sorting, matching against your Master List, and now adding Packing Slips to each order – adds another layer of security.
Pre-bagging is one of the most essential ways to minimize spoilage while shipping your online store orders.
Before anything goes into a bag, be sure everything is meticulously prepared and organized. During this step, you actually start building individual orders.
All you need to do is place each order on a table, place the packing slip on it, and then check this against your master list.
Work through one order at a time, drawing from the supply of organized sizes and designs you built earlier.
Step 6: The Double Check – no extras, no missing pieces?
The goal: make sure every single order is ready to go – before you ever put a single order into a bag.
How it works: since you’ve counted when the items came in, counted as you checked the print totals, and checked against the master list – everything should be perfectly aligned here.
If you have extras or are short a few pieces, now is the time to scramble your team and figure out where things went wrong.
It’s almost always the case that something has been misallocated to the wrong order.
Since you haven’t bagged anything yet, it’s easy to fix problems and find out which order is short (or oversupplied).
After this step, no changes can be made. All errors should be caught by the multiple redundant steps you’ve taken. You are only bagging the orders from here on out!
Step 7: Pack the orders (poly mailers and bulk bags)
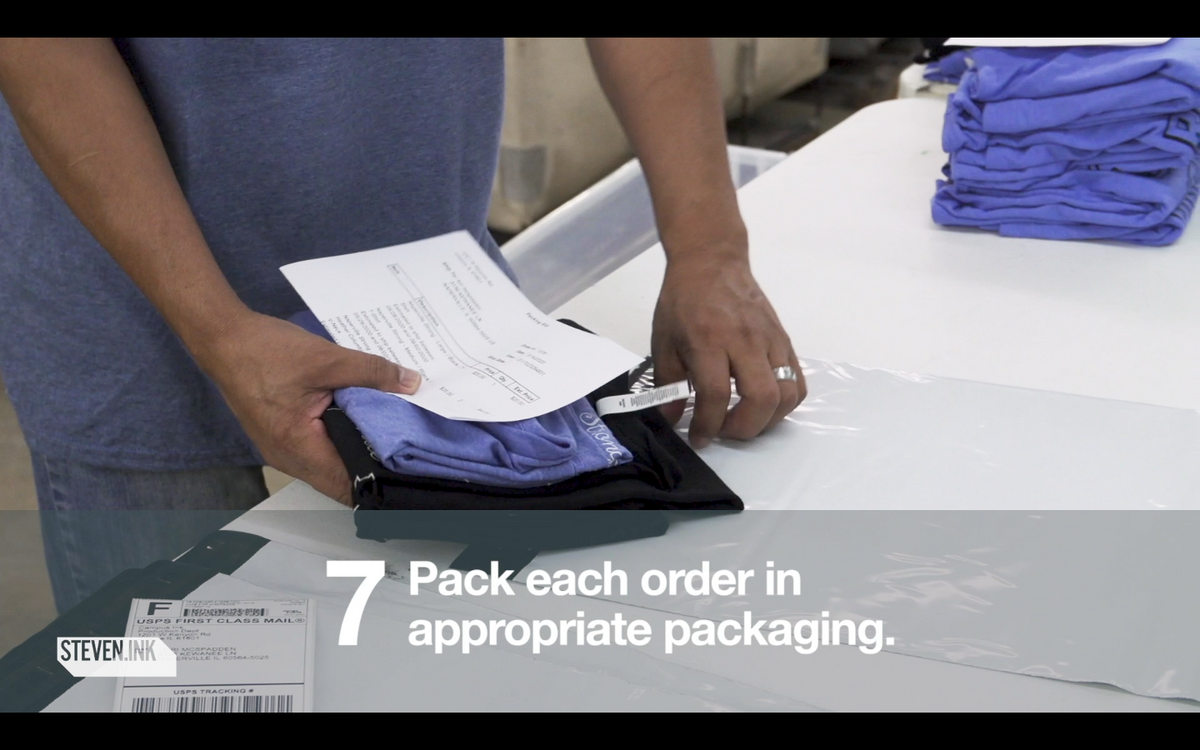
The goal: have a consistent packaging type for each size order
How it works: consistent packaging keeps things organized and simple.
If you’re mailing one shirt to one person, keep it simple with a poly mailer.
If you’re sending group orders, however – or simply larger bulk orders – you may want to spring for a nicer bagged container.
Never bag items before all of the orders have been checked and completed.
There are two reasons to wait to bag and tag until the very end: it makes bagging faster, and it ensures that any errors in orders are easily caught and corrected. You don’t have to search through sealed bags and ruin your hard work because one or two shirts are missing!
Step 8: Include “Thank You” cards for every single order
The goal: market your business and make an impression – and get a review!
How to do it: include a postcard with every single order. It should, at a minimum, include a thank you, who to contact in case something is wrong, and how to leave a review for your business.
This is where online stores become incredibly powerful: you don’t just touch one organizer for one event.
You make an impression on every single customer – and they’ll remember that you knocked it out of the park.
Step 9: Have ONE PERSON distribute items (and use a cover sheet)
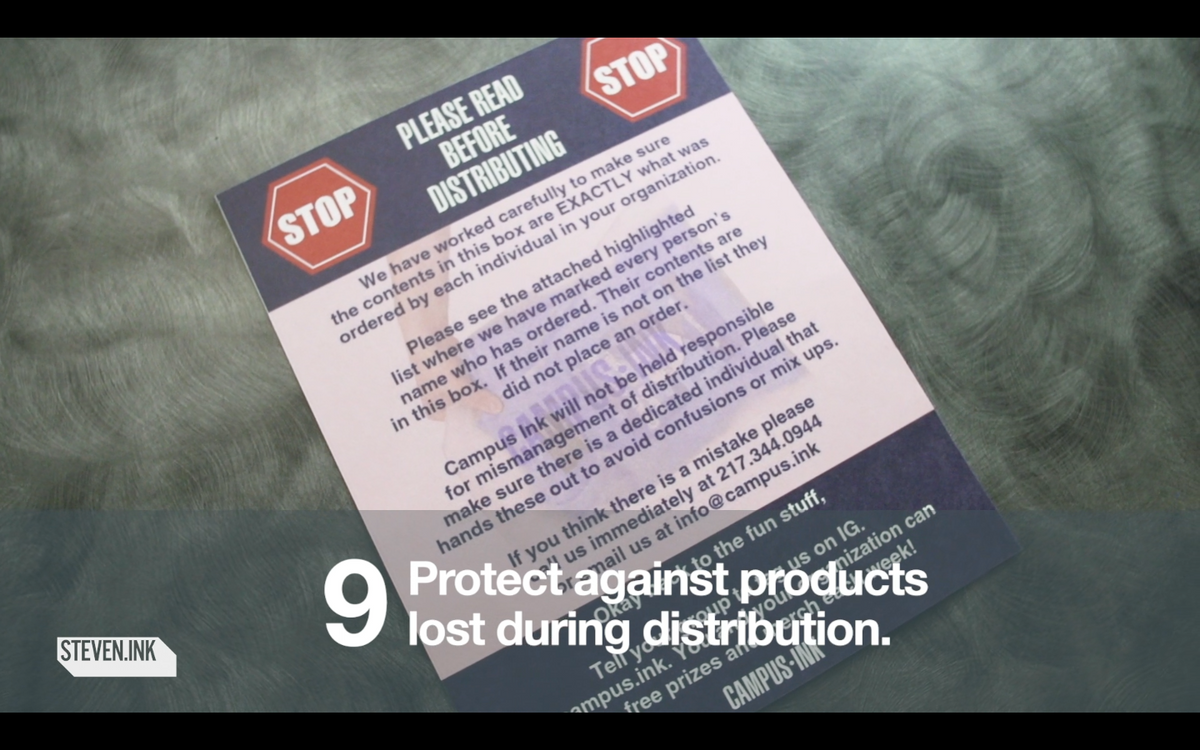
The goal: have one designated person distribute items for group orders (if applicable)
How to do it: send a simple, one-page letter that explains a stern policy that outlines two MAJOR policies you should have.
First: your shop is not responsible for orders that are lost during distribution!
Second: require that the organization designate a single person that’s responsible for distributing the items!
Make the organizer who’s responsible for dealing with the merchandise feel like a superstar. They didn’t want to be a shirt-distributing jockey – so make it easy.
This is an essential step in successful group orders. You must eliminate the possibility that people take the wrong items – or worse, steal other people’s items.
Do everything in your power to avoid giving a group a box of merchandise and no plan to distribute it.
In general, having a solid shipping workflow ties directly back to making sure your shop’s overall order management process is dialed in. If you think your process could use a little refinement (and let’s be honest, every business needs to reassess from time to time!), consider some on-press training from pros like ROQ, Multicraft, and MADE LAB. They host onsite training events across the country with a variety of focuses.
BONUS: How much should you charge for shipping your products online?
Every business will have different costs associated with shipping and bagging and tagging.
Assume a 10% markup (after associated procurement, administrative, and print costs) for shipping your online store orders. You should consider this part of your pricing – and may need to re-evaluate it if you find shipping costs are higher than you anticipate.

0 Comments