
Having problems with your emulsion? Need to learn how to use an exposure calculator for screen printing?
Maybe you’ve made a post to a Facebook Group asking for help.
Your screens look bad, and you just can’t figure out how to dial in your exposure time.
Every expert screen printer will tell you the same thing: You need an exposure calculator.
But how do you do use this magical tool? And what should you know to get the most out of it?
We’ll show you how.
Prepare correctly first
Before you ever use an exposure calculator, you need to get a few things straight!
How you prepare your screens determines how useful your exposure calculator can be.
Your exposure time is one of the most powerful print variables you can control. So it’s worth your time to understand and investigate exposure, emulsion, and more – basic fluency with an exposure calculator is a foundational skill for getting better prints.
Before you dive into exposure, make sure that you have the basics of preparing your screens dialed in.
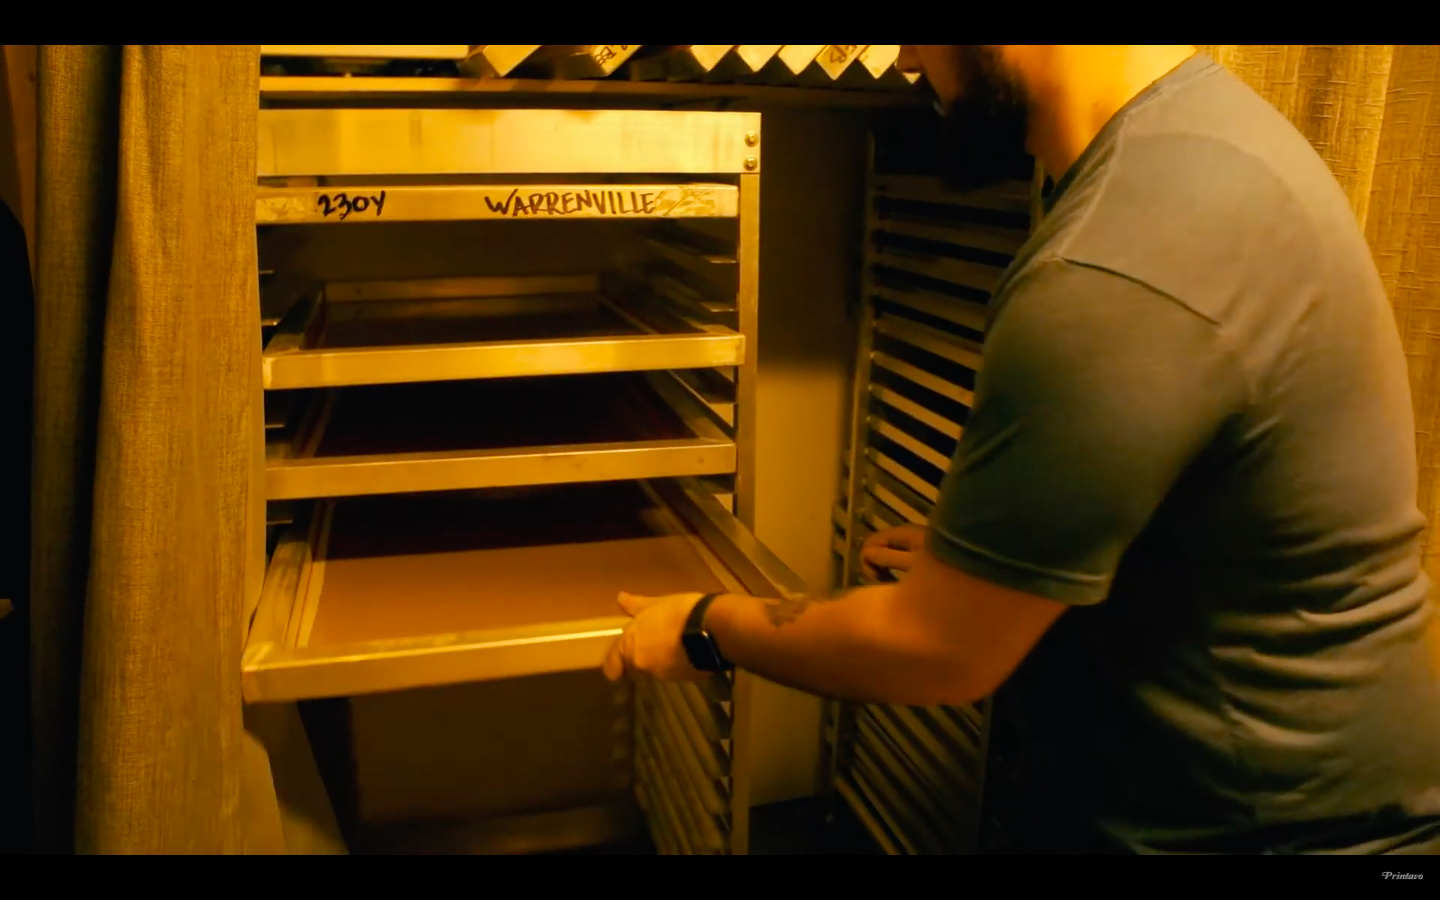
Clean screens
Always clean your screens thoroughly during each reclaim. This means you shouldn’t have any ghost images, chemicals, or ink left on your screen. Failing to properly clean your screens can have a ripple effect in the process, causing a variety of problems down the line. Spend the time to clean your screens…or else.
Screens coated correctly

You have to correctly coat your screens to use an exposure calculator. This step is usually where new screen printers have trouble with their exposure calculator: their screens are not coated correctly. “Correctly coated screens” means: applying an even coat of emulsion and achieving the glossy-matte surface that is the sign of a perfectly coated screen. If you’re still struggling with coating screens, you can learn how to coat your screens here.
Screens dried correctly
Drying your screens once you’ve applied emulsion is a simple process, but you want to provide the right environment for your screens to dry. Only attempt to use your exposure calculator on fully dried and coated screens. If it’s still “sticky” to the touch, it’s not dry enough for an exposure test.
Mesh count matters
Don’t assume you can use one exposure time for every mesh count. You will want to use your exposure calculator multiple times on each mesh count that you utilize in your shop. This is because exposure time varies with mesh count.
Take careful notes
Since exposure calculations are a time consuming (but high-value) activity with lots of details, it’s important to take good notes. At a minimum, you’ll want to keep track of your:
- Mesh count
- Emulsion type and mixture
- Exposure times
- Screen tension
This will ensure your exposure calculations are repeatable and can be compared with later results. Keeping a notebook (or dry erase board) in your screen room is an easy way to ensure accurate exposure.
What is an exposure calculator?
When you screen print, you use a light-sensitive emulsion to create a stencil of an image. This image is printed onto transparent film. Light is applied to the screen, the printed film blocks the light, and the screen printer washes out the screen. A negative image remains on the screen.
Then, a screen printer pushes ink through that stencil onto whatever they’re printing on – whether t-shirt or circuit board.
“Light-sensitive” refers to the fact that screen printing emulsion is hardened by light.
When you apply UV light to the emulsion, it goes from a liquid into a semi-solid state. This semi-solid emulsion is perfect for screen printing: it isn’t too soft or too hard, and ink easily passes through it while retaining a sharp printed edge.
An exposure calculator helps screen printers determine exactly how much light they need to use to harden their emulsion.
How an exposure calculator works
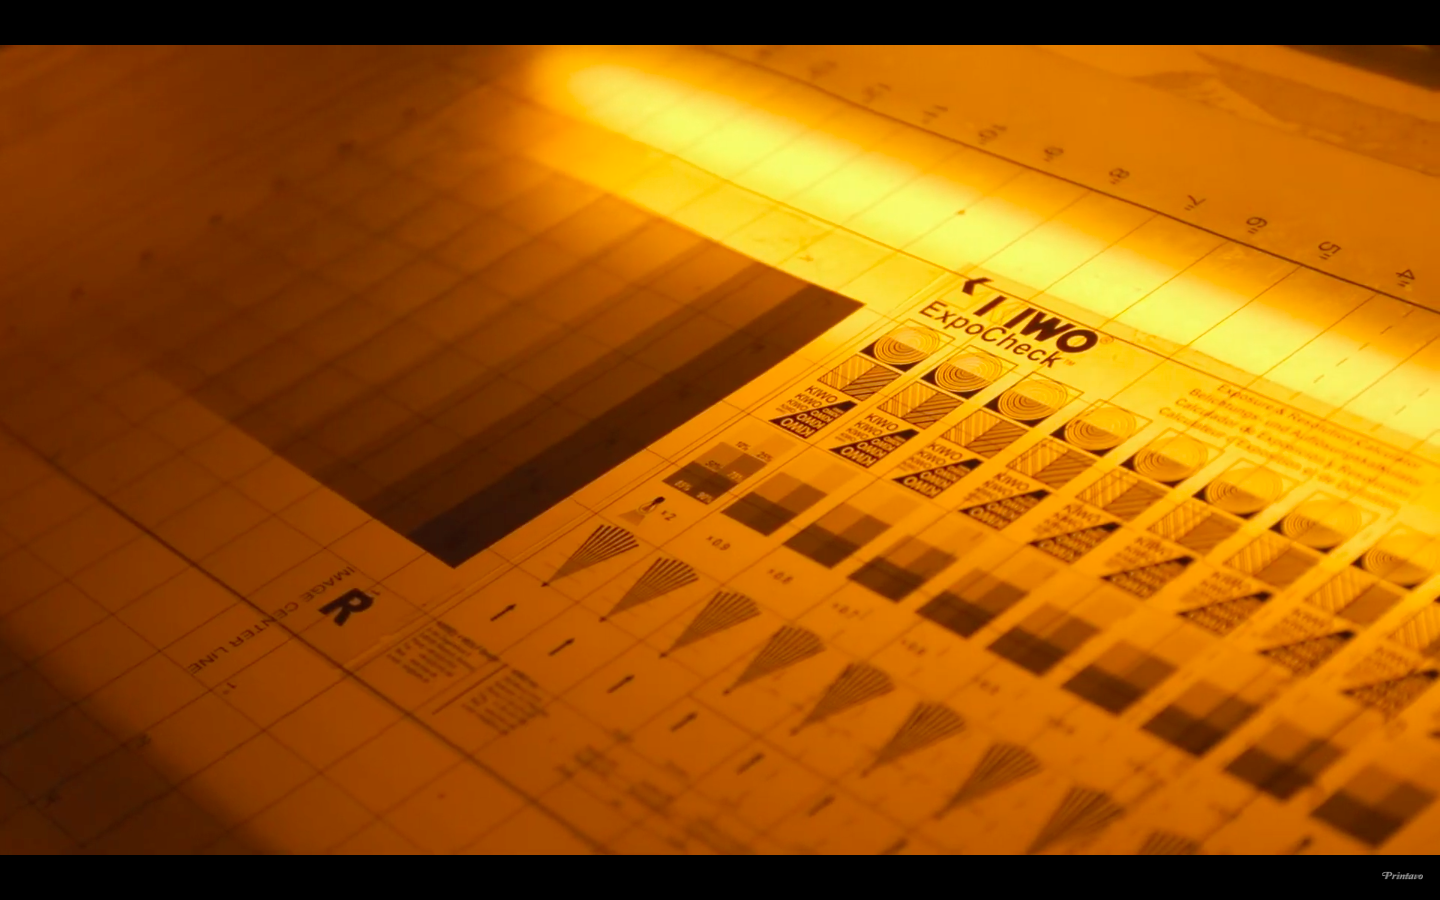
Exposure calculators are usually made of two durable printed transparent films. This is often a slightly more durable version of the transparent films that screen printers already use in their shops to make screens, though many screen printers simply make their own exposure calculators.
Most exposure calculators work by using something called the step wedge technique.
This simple technique is easy to explain.
One film contains various detailed printed images: small text, curves, and even halftones.
The second sheet contains progressively darker boxes of ink. Think of this second sheet like sunglasses that go from dark to light.
By combining the two sheets on top of each other, the exposure calculator shows you how your emulsion will look with varying degrees of light passing through.
In other words, an exposure calculator shows you what an image will look like on your screen if you apply varying amounts of light to it.
Note: some exposure calculators use a simpler technique. They are simply varying shades of black. The screen printer then exposes and washes out the screen until only some of the black shades remain on the screen.
Why not just expose as much as possible?
If it seems like a lot of trouble to use an exposure calculator, you’re probably thinking: why not just blast the screens with light? More is better, right?
Remember that light-sensitive emulsion is not actually completely solid: it’s flexible, since screen printing requires a flexible screen in order to work correctly.
If you under-expose your screens, the emulsion quickly fails and has poor image quality. It essentially never becomes hard enough and is still liquid.
If you over-expose your screens, you (ironically) face the same challenges. Brittle, over-dry, and hardened emulsions print poorly and fall apart.
The goal of using an exposure calculator is to find a sweet spot where your emulsion holds detail, lasts for a long time on press, but isn’t too hard.
How to use an exposure calculator
If you’ve prepared your screens correctly and understand the theory behind exposure calculators, dive in and try it for yourself.
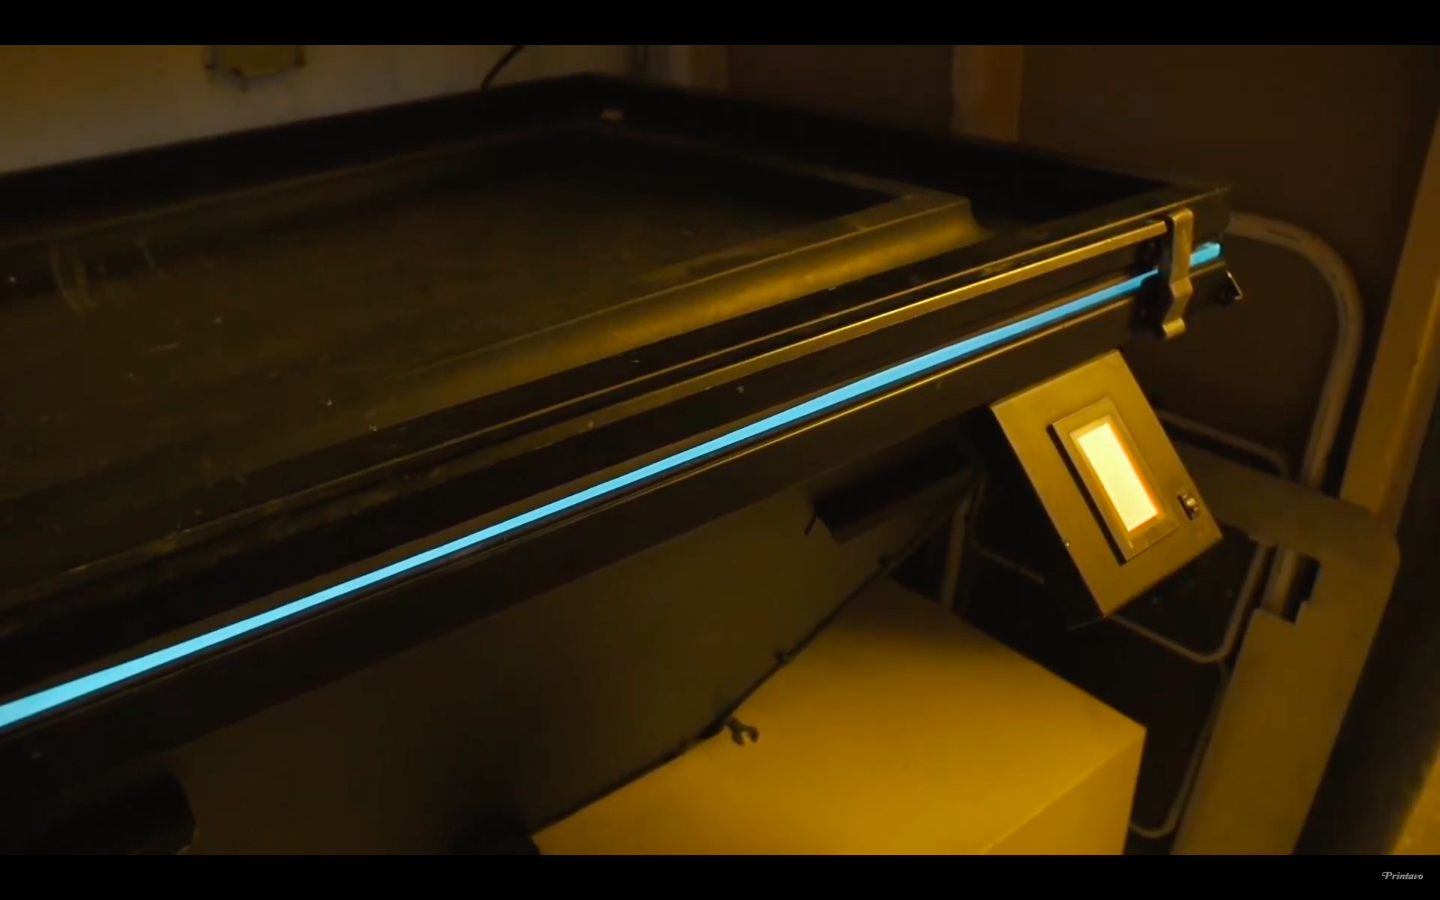
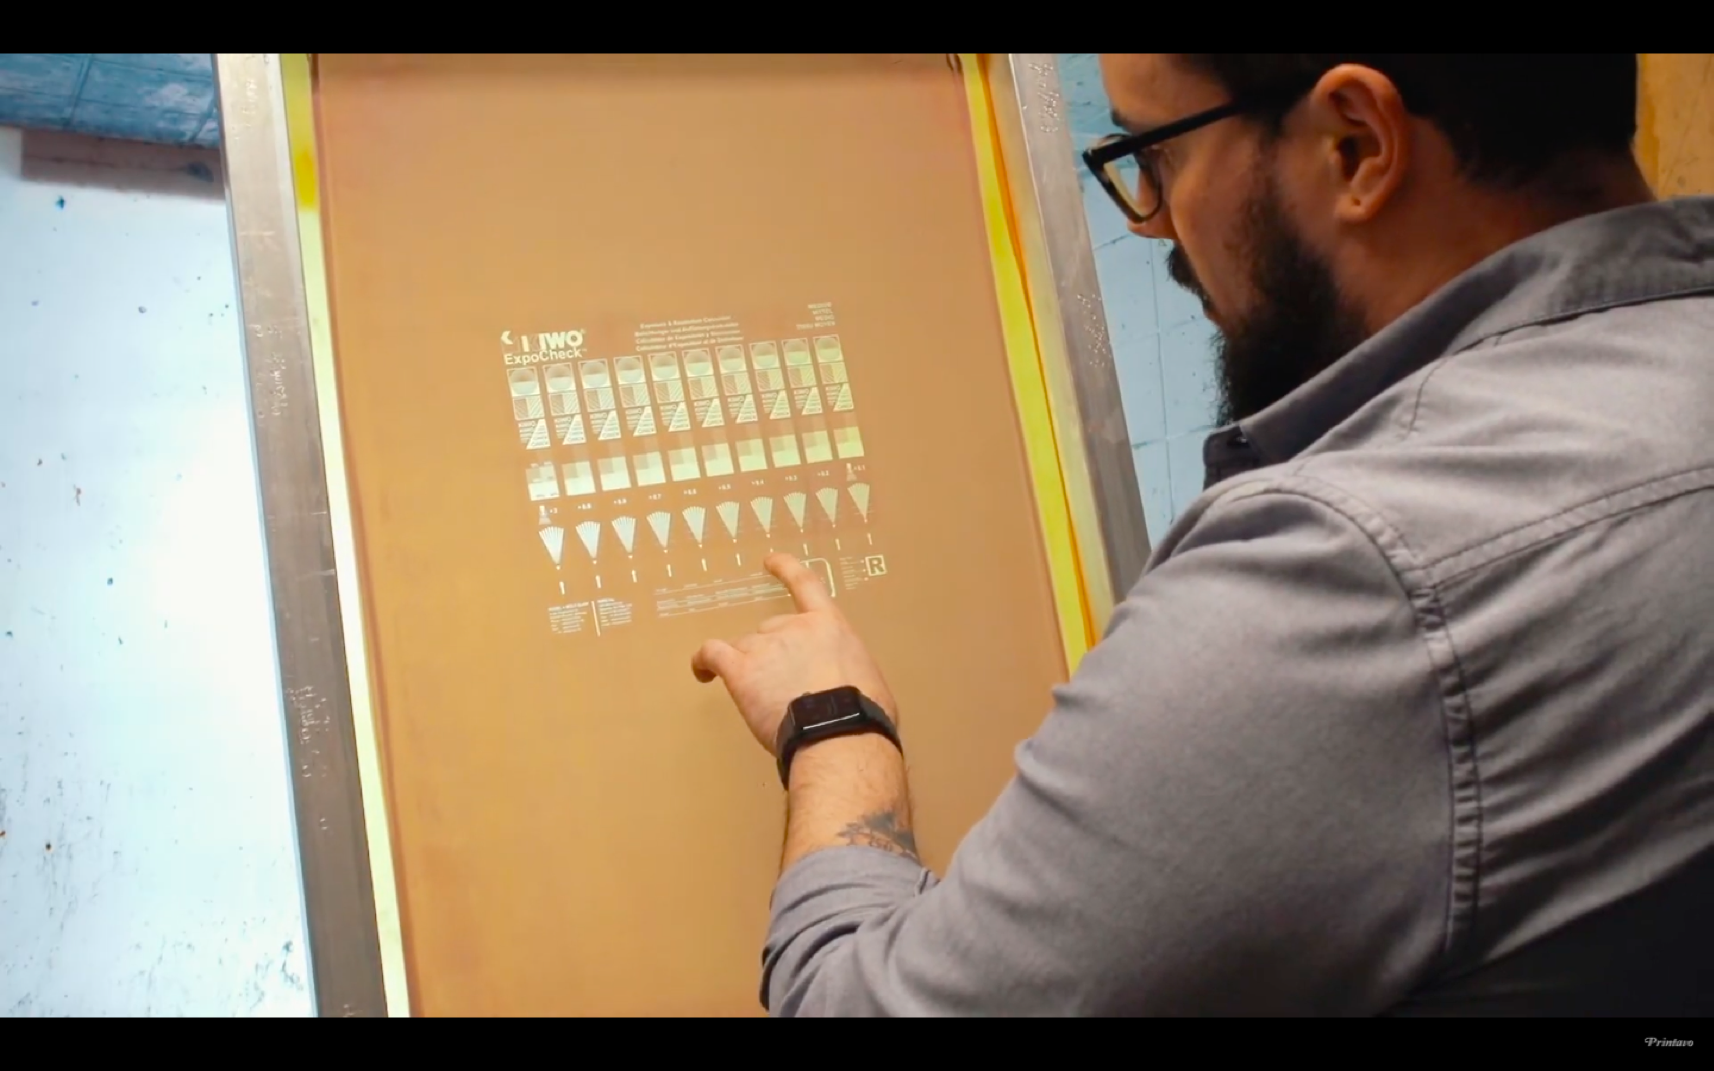
Place the exposure calculator onto a clean and prepped screen and hop over to your exposure unit.
Expose your screen with more light than usual
Use more light than usual with your exposure calculator. For example, if you usually expose your screens for 60 seconds, you’ll want to use a 120 second exposure with your exposure calculator.
Most exposure calculators have specific instructions for exposure time: they may want you to double (or even triple) your usual exposure time.
By applying more light than usual, we get better data to work from and see a broader range of possible exposure times.
Gently wash out your screen
If possible, soak your screen for a few minutes in a dip tank. This will loosen the emulsion and allow you to gently spray out the screen. Preserving small details is key here: if you can avoid using your pressure washer while using an exposure calculator, you’ll get a better picture of the range of exposure times available to you.
How to read and use your exposure calculations
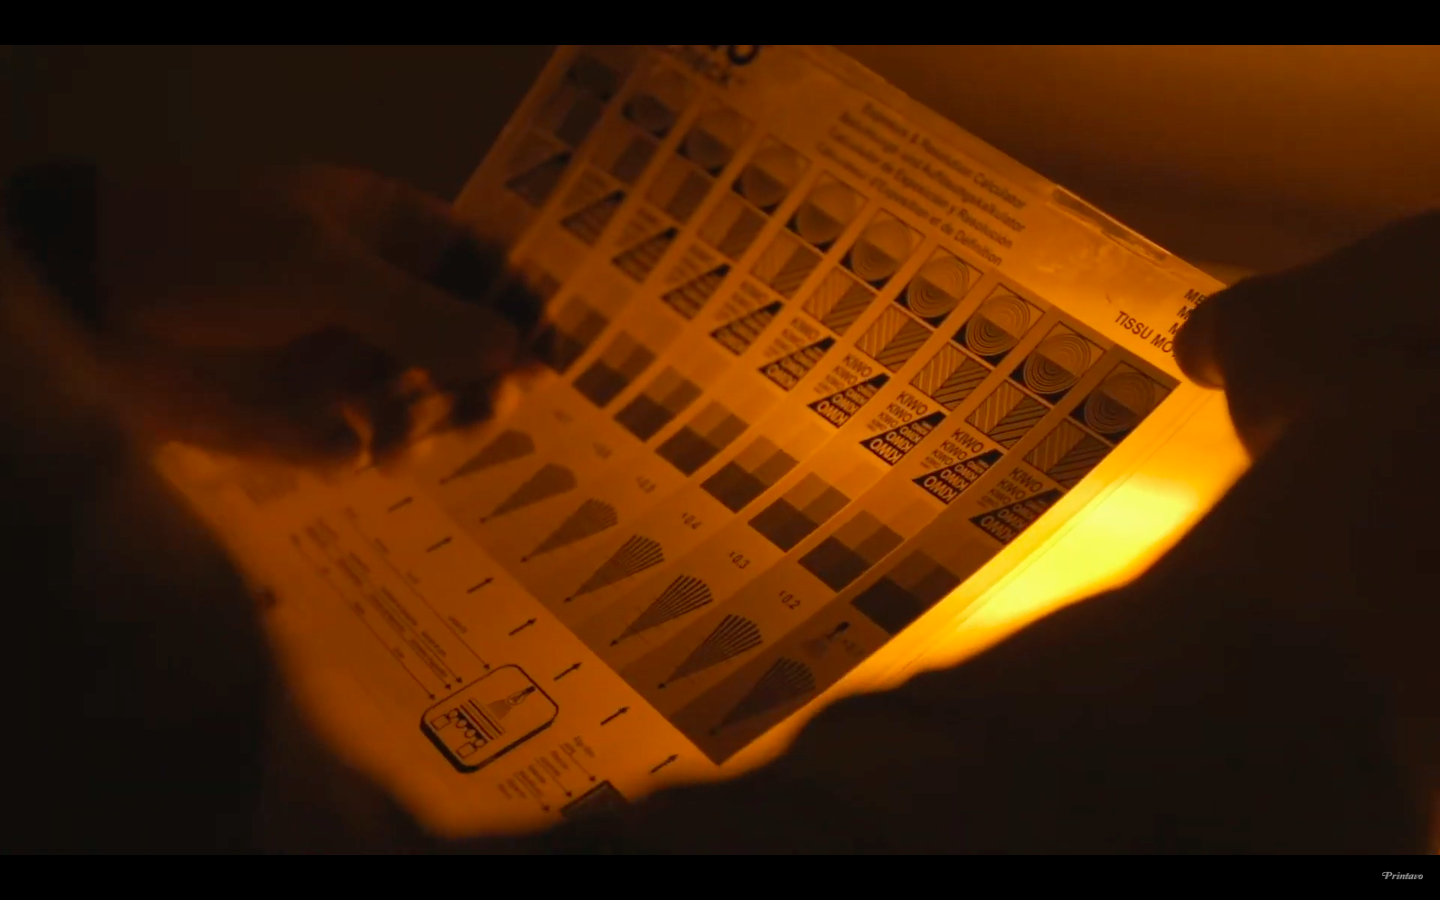
Your exposure calculator may come with specific directions for reading the results. You are likely looking for a combination of fine detail and image retention. Some simpler exposure calculators will simply have you looking for a certain number of gray bars.
Once you’ve chosen the best image, use your exposure calculator’s instructions to determine how to calculate your exposure time.
In our example, we found that the “0.6” column looked best. KIWO’s exposure calculator tells us to multiply the amount of time we exposed our screen for by that number (0.6).
We looked at a 156 mesh screen, so this result is only valid for that mesh count and the specific emulsion we used.
74 second exposure time * 0.6 exposure calculator factor = 44 second recommended exposure
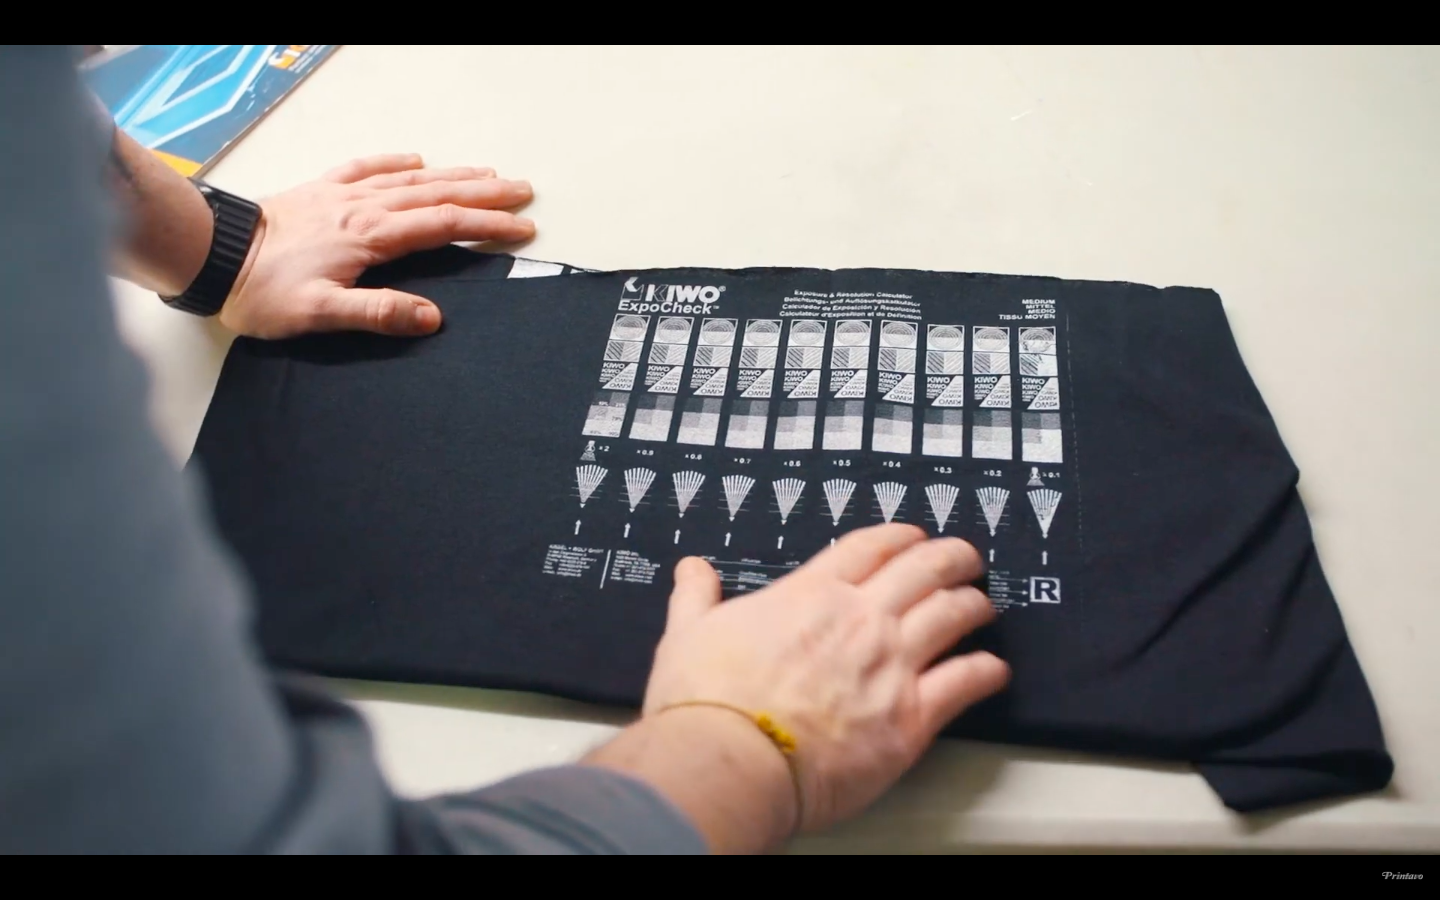
From here, we suggest going a step further: actually print with the screen you’ve exposed.
Which print looks best on an actual garment?
Exposure calculators we recommend
Looking for an exposure calculator?
Here are some options:
- KIWO’s Expo Check
- A durable and trusted source for dialing in your exposure
- Well worth the price, known for lasting for years
- Ryonet’s Step Wedge Calculator
- A simple, tried-and-true way to figure out your exposure times
- Quick, easy, and affordable
- Anthem’s DIY exposure calculator
- Print your own exposure calculator for free
- It’s hard to beat free, but it’s not as durable or scientific

0 Comments